These terms and conditions (together with our Privacy Policy, Terms of Website Use, and Website Acceptable Use Policy tell you information about us and the legal terms and conditions (the “Terms”) on which we sell any of the products (the “Products”) listed on our website (“our site”) to you.
These Terms will apply to any contract between us for the sale of Products by us to you (the “Contract”). Please read these Terms carefully and make sure that you understand them, before ordering any Products from us. Please note that before placing an order you will be asked to agree to these Terms. If you refuse to accept these Terms, you will not be able to order any Products from us.
You should print a copy of these Terms or save them to your computer for future reference.
We amend these Terms from time to time as set out in clause 8. Every time you wish to order Products, please check these Terms to ensure you understand the terms which will apply at that time. These Terms were most recently updated in November 2022.
These Terms, and any Contract between us, are only in the English language.
1. Information about us
1.1 We operate the website rooflights.com. We are Glazing Vision Limited, a company registered in England and Wales under company number 2987024 and with our registered office at Sawmills Road, Diss, Norfolk, IP22 4RG. Our VAT number is 637724126.
1.2 Contacting us if you are a consumer:
1.2.1 To cancel a Contract in accordance with your legal right to do so as set out in clause 9, you just need to let us know that you have decided to cancel. The easiest way to do this is to complete the cancellation form on our website. A link to the website cancellation form will be included in our Order Confirmation. If you use this method, we will e-mail you to confirm we have received your cancellation. You can also e-mail us at info@rooflights.com or contact our Customer Services team by telephone on 01379 771002 or by post to Sawmills Road, Diss, Norfolk, IP22 4RG. If you are emailing us or writing to us, please include details of your order (including the order reference number) to help us to identify it. If you send us your cancellation notice by e-mail or by post, then your cancellation is effective from the date you send us the e-mail or post the letter to us.
1.2.2 If you wish to contact us for any other reason, including because you have any complaints, you can contact us by telephoning our customer service team at 01379 771002 or by e-mailing us at info@rooflights.com
1.2.3 If we have to contact you or give you notice in writing, we will do so by e-mail or by pre-paid post to the address you provide to us in your order.
1.3 Contacting us if you are a business. You may contact us by telephoning our customer service team at 01379 771002 or by e-mailing us at info@rooflights.com. If you wish to give us formal notice of any matter in accordance with these Terms, please see clause 18.3.
Our Products
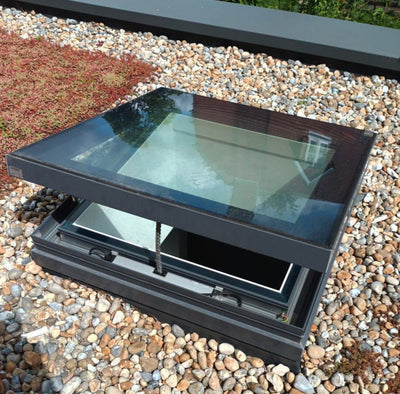
2.1 The images of the Products on our site are for illustrative purposes only. Although we have made every effort to display the colours accurately, we cannot guarantee that your computer’s display of the colours accurately reflects the colour of the Products. Your Products may vary slightly from those images.
2.2 Although we have made every effort to be as accurate as possible, we cannot guarantee that all sizes, weights, capacities, dimensions and measurements indicated on our site are 100% accurate.
2.3 The packaging of the Products may vary from that shown on images on our site.
2.4 Exclusions; If your product contains toughened glass it may be susceptible to Nickel Sulphide inclusions (NiS). NiS is an inherent risk in the toughening process, where NiS is present, there is no way to identify its presence by the naked eye. If your glass does contain NiS there is a risk that it will shatter spontaneously into fragments. When an inner pane is toughened Glazing Vision always heat soak test. The glass can be tested by heat soak testing – heat soak testing doesn’t ensure that NiS is not present, but it reduces the possibility of its presence. Glazing Vision buy in all our glass from quality approved suppliers, however, no glass suppliers warranty against NiS. Therefore, if your rooflight does break with no explanation then Glazing Vision accepts no responsibility for any costs incurred by clients if such spontaneous breakage occurs.
3. Use of our site
Your use of our site is governed by our Privacy Policy, Terms of Website Use and Website Acceptable Use Policy. Please take the time to read these, as they include important terms which apply to you.
4. How we use your personal information
We only use your personal information in accordance with our Privacy Policy. Please take the time to read our Privacy Policy, as it includes important terms which apply to you.
5. If you are a consumer
This clause 5 only applies if you are a consumer.
If you are a consumer, you may only purchase Products from us if you are at least 18 years old.
6. If you are a business customer
This clause 6 only applies if you are a business.
6.1 If you are not a consumer, you confirm that you have authority to bind any business on whose behalf you purchase Products from us.
6.2 These Terms and our Privacy Policy, Terms of Website Use and Website Acceptable Use Policy constitute the entire agreement between you and us and supersedes and extinguishes all previous agreements, promises, assurances, warranties, representations and understandings between us, whether written or oral, relating to its subject matter.
6.3 You acknowledge that in entering into this Contract you do not rely on any statement, representation, assurance or warranty (whether made innocently or negligently) that is not set out in these Terms or our Privacy Policy, Terms of Website Use and Website Acceptable Use Policy.
6.4 You and we agree that neither of us shall have any claim for innocent or negligent misrepresentation or negligent misstatement based on any statement in this Contract.
7. How the contract is formed between you and us
7.1 Our shopping pages will guide you through the steps you need to take to place an order with us. Our order process allows you to check and amend any errors before placing your order with us. For orders placed on our site, please take the time to read and check your order at each page of the order process. For orders placed by telephone, please carefully listen to the information given by us during the call and check the details of your order (as set out in the email from us acknowledging that we have received your order) are correct.
7.2 After you place an order, you will receive an e-mail from us acknowledging that we have received your order. However, please note that this does not mean that your order has been accepted. Our acceptance of your order will take place as described in clause 7.3.
7.3 We will confirm our acceptance to you by sending you an e-mail that confirms the Products you have ordered have been dispatched (the “Dispatch Confirmation”). The Contract between us will only be formed when we send you the Dispatch Confirmation.
7.4 If we are unable to supply you with a Product, for example because that Product is not in stock or no longer available or because we cannot meet your requested delivery date or because of an error in the price on our site as referred to in clause 12.5, we will inform you of this by e-mail and we will not process your order. If you have already paid for the Products, we will refund you the full amount including any delivery costs charged as soon as possible.
8. Our right to vary these Terms
8.1 We amend these Terms from time to time. Please look at the top of this page to see when these Terms were last updated.
8.2 Every time you order Products from us, the Terms in force at the time of your order will apply to the Contract between you and us.
8.3 We may revise these Terms as they apply to your order from time to time to reflect the following circumstances:
8.3.1 changes in relevant laws and regulatory requirements; and / or
8.3.2 changes in any specifications in respect of our Products.
8.4 If we have to revise these Terms as they apply to your order, we will contact you to give you reasonable advance notice of the changes and let you know how to cancel the Contract if you are not happy with the changes. You may cancel either in respect of all the affected Products or just the Products you have yet to receive. If you opt to cancel, you will have to return (at our cost) any relevant Products you have already received, and we will arrange a full refund of the price you have paid, including any delivery charges.
9. Your consumer right of return and refund.
This clause 9 only applies if you are a consumer.
9.1 If you are a consumer, you have a legal right to cancel a Contract under the Consumer Contracts (Information, Cancellation and Additional Charges) Regulations 2013 during the period set out below in clause 9.3. This means that during the relevant period if you change your mind or decide for any other reason that you do not want to receive or keep a Product, you can notify us of your decision to cancel the Contract and receive a refund. Advice about your legal right to cancel the Contract is available from your local Citizens’ Advice Bureau or Trading Standards office.
9.2 However, this cancellation right does not apply in the case of any Products that are made to order (Including Korniche Lanterns and Sonasky blinds), bespoke, personalised or tailored to your specifications. Additionally Rooflights.com provide a number of third party products and thus by purchasing those products you are accepting the manufacturers refund policy stated in section 9.10.
9.3 Your legal right to cancel a Contract starts from the date of the Dispatch Confirmation (the date on which we e-mail you to confirm our acceptance of your order), which is when the Contract between us is formed. Your deadline for cancelling the Contract then depends on what you have ordered and how it is delivered, as set out below:
Your Contract End of the cancellation period
Your Contract is for a single Standard Product (which is not delivered in instalments on separate days). The end date is the end of 14 days after the day on which you receive the Product.
Example: if we provide you with a Dispatch Confirmation on 1 January and you receive the Product on 10 January you may cancel at any time between 1 January and the end of the day on 24 January.
Your Contract is for either of the following:
• one Product which is delivered in instalments on separate days.
• multiple Products which are delivered on separate days. The end date is 14 days after the day on which you receive the last instalment of the Product or the last of the separate Products ordered.
Example: if we provide you with a Dispatch Confirmation on 1 January and you receive the first instalment of your Product or the first of your separate Products on 10 January and the last instalment or last separate Product on 15 January you may cancel in respect of all instalments and any or all of the separate Products at any time between 1 January and the end of the day on 29 January.
Your Contract is for the regular delivery of a Product over a set period. The end date is 14 days after the day on which you receive the first delivery of the Products.
Example: if we provide you with a Dispatch Confirmation on 1 January in respect of Products to be delivered at regular intervals over a year and you receive the first delivery of your Product on 10 January, you may cancel at any time between 1 January and the end of the day on 24 January. 24 January is the last day of the cancellation period in respect of all Products to arrive during the year.
Your Contract is for a Product that is made to order, bespoke, personalised or tailored to your specifications. The end date is the end of 24 hours after the day on which you purchase the Product.
Example: if you purchase your Product that is made to order, bespoke, personalised or tailored to your specifications on 1 January, you may cancel your order at any time between 1 January and 2 January.
9.4 To cancel a Contract, you just need to let us know that you have decided to cancel. The easiest way to do this is to complete the cancellation form on our website. A link to the website cancellation form will be included in our Order Confirmation. If you use this method we will e-mail you to confirm we have received your cancellation.
You can also e-mail us at info@rooflights.com or contact our Customer Services team by telephone on 0333 016 4349 or by post to Sawmills Road, Diss, Norfolk, IP22 4RG. If you are e-mailing us or writing to us, please include details of your order to help us to identify it. If you send us your cancellation notice by e-mail or by post, then your cancellation is effective from the date you send us the e-mail or post the letter to us. For example, you will have given us notice in time as long as you get your letter into the last post on the last day of the cancellation period or e-mail us before midnight on that day.
9.5 If you cancel your Contract we will:
9.5.1 refund you the price you paid for the Products. However, please note we are permitted by law to reduce your refund to reflect any reduction in the value of the goods, if this has been caused by your handling them in a way which would not be permitted in a shop.
9.5.2 refund any delivery costs you have paid, although, as permitted by law, the maximum refund will be the costs of delivery by the least expensive delivery method we offer (provided that this is a common and generally acceptable method). For example, if we offer delivery of a Product within 3 – 5 days at one cost but you choose to have the Product delivered within 24 hours at a higher cost, then we will only refund what you would have paid for the cheaper delivery option.
9.5.3 make any refunds due to you as soon as possible and in any event within the deadlines indicated below:
9.5.3.1 if you have received the Product and we have not offered to collect it from you: 14 days after the day on which we receive the Product back from you or, if earlier, the day on which you provide us with evidence that you have sent the Product back to us. For information about how to return a Product to us, see clause 9.8;
9.5.3.2 if you have not received the Product or you have received it and we have offered to collect it from you: 14 days after you inform us of your decision to cancel the Contract.
9.6 If you have returned the Products to us under this clause 9 because they are faulty or mis-described, we will refund the price of the Products in full, together with any applicable delivery charges, and any reasonable costs you incur in returning the item to us.
9.7 We will refund you on the credit card or debit card used by you to pay. If you used vouchers to pay for the Product we may refund you in vouchers.
9.8 If a Product has been delivered to you before you decide to cancel your Contract:
9.8.1 then you must return it to us without undue delay and in any event not later than 14 days after the day on which you let us know that you wish to cancel the Contract. You can either return it to us at our factory or request a price for us to collect the Product. Our returns address is Sawmills Road, Diss, Norfolk, IP22 4RG. If we have offered to collect the Product from you, we will collect the Products from the address to which they were delivered. We will contact you to arrange a suitable time for Click and Collect collection
9.8.2 unless the Product is faulty or not as described (in this case, see clause 9.6), you will be responsible for the cost of returning the Products to us. If we have offered to collect the Product from you, we will charge you the direct cost to us.
9.9 Because you are a consumer, we are under a legal duty to supply Products that are in conformity with this Contract. As a consumer, you have legal rights in relation to Products that are faulty or not as described. These legal rights are not affected by your right of return and refund in this clause 9 or anything else in these Terms. Advice about your legal rights is available from your local Citizens’ Advice Bureau or Trading Standards office.
9.10 Third party product returns policies:
Korniche – Made to order, no refunds possible, however parts damaged in transit or parts that do not match the specifications on the order confirmation will be replaced if notified within 48 hours of receipt (7 days by post).
Sona – Customer gives written notice of such defect to the Supplier within 5 Business Days of such delivery (the Customer having taken the steps above such as considering instructions that came with the Goods without resolving the issue), the Supplier shall at its option:
repair or replace the defective Goods (costs and labour costs only being borne by the Supplier) within 21 Business Days of receiving the Customer’s notice;
or refund to the Customer the price for those Goods (or parts thereof, as appropriate) which are defective.
Where the Customer in ordering or enquiring about Goods or Services provides the Supplier with incorrect sizes or information or orders the wrong Goods or Services the Supplier is not liable for any failure of the Goods or Services caused by that error.
Fakro – Fakro GB Ltd will accept returns of standard items within 30 days from the date of delivery, providing they are in good condition. The customer will have 4 weeks from the date of agreement to return the goods, after this they will not be accepted.
Please note, special items and non-stock items cannot be returned.
Rooflights.com will provide the customer with a Service Returns Number to send the goods back to manufacturer.
Returns are the responsibility of the customer to arrange, and will be paid for by the customer, a 35% administration charge will apply, however this administration charge may be waivered if a re-order has been placed for the same value or more. Goods must be returned in a re-saleable condition. The goods will be inspected, and any re-packing will be charged at £35.00 per box. Any damaged items will be refused a credit and the customer will have 4 weeks to reclaim the damaged goods, with them paying the carriage to have them back.
Velux – Customer Returning Items – Velux will accept any products back within 4 months of delivery and charge £20 per window and flashing returned, but other items such as blinds can be returned with no charge. They will take open boxes back, but any returns must be in the original box and fit to be transported on a courier.
Damaged Boxes – These need to be noted damaged on the delivery note and Velux will replace and collect the item, assuming the product is unable to be used.
Damaged Items – ‘Invisible’ damage product ie the box is in good condition but the product is damaged. Velux needs to be notified within 1 month and they can replace or refund this item.
Brett Martin – The request for restock is made in writing to; info@rooflights.com along with reason for restocking. This request must be made within 28 days of receipt of Delivery.
A collection date will be arranged and a signature must be obtained by the collection driver. No products will be taken if left unattended and a signature is unavailable. Collections are charged at £85 should the customer you not wish to arrange your own return. If for some reason a further collection needs to be arranged then an additional charge may be applied for this service. In order to improve the efficiency of request claim processing a Customer service agent will request a photo of the product in packaged condition prior to arranging a collection date.
All items must be returned in their original packaging and with sufficient protection to avoid damage occurring in transit. All glass units will only be accepted for restock on their original pallet and the fixing bolts must be applied to secure the glass unit to the pallet to avoid damage occurring in transit. Kerbs (where applicable) must be securely attached to avoid damage occurring in transit.
The Product is to be returned to Brett Martin in the condition it was dispatched in (i.e. in saleable condition) which is determined by us following inspection upon return to our site (note: collection driver will not inspect the product). If the product is deemed not to be in saleable condition the original order value will apply.
The Price paid for the Product (together with any applicable VAT) shall be returned by way of a credit note within 7 working days following inspection and approval of Product, after the deduction of a restock charge by the seller (in the amount of 35% of the Price paid). Note that Brett Martin AOV Smoke Vents are only refundable if they are the ‘standard size’ 1050 x 1050 1350 x 1350 1200 x 1200 1500 x 1050 1350 x 1050 1500 x 1500 are all examples of standard size. Anything outside of this is considered bespoke and is non-refundable.
10. Delivery
10.1 We will contact you with an estimated delivery date, for Standard Products this will be within 30 days after the date of the Dispatch Confirmation (the date on which we e-mail you to confirm our acceptance of your order). For Products that are made to order, bespoke, personalised or tailored to your specifications, you will be made aware of the expected lead time. Occasionally our delivery to you may be affected by an Event Outside Our Control. See clause 17 for our responsibilities when this happens.
10.2 Kerbside Delivery – Glass rooflights can be heavy, cumbersome and may have uneven weight distribution. rooflights.com will provide the Buyer with confirmed weights prior to delivery and these will be clearly labelled on the product. The Buyer is wholly responsible for removing the rooflight from the delivery vehicle to the prepared upstand. rooflights.com strongly recommend a mechanical lift in order to safely move the rooflight into position, if this is not possible, then safe manual handling practices should be followed at all times ensuring a competent person has completed a risk assessment before the lift commences. The Buyer must comply with the Manual Handling Operations Regulations 1992, as amended Manual Handling Operations Regulations MHOR2002, specifically regulation 4 (1). Further guidance can be found at http://www.hse.gov.uk/msd/faq.htm, The Buyer also needs to take into consideration when undertaking a manual lift that this could lead to point loading if supported unevenly which could damage your product. Rooflights.com accepts no liability for any damage incurred when moving rooflights from the delivery vehicle to the prepared upstand. All foreseeable risk should be suitably and adequately managed by the Buyer upon arrival at the Buyer’s address.
10.3 Delivery of an Order shall be completed when we deliver the Products to the address you gave us or a carrier organised by you collect them from us and the Products will be your responsibility from that time.
10.4 You own the Products once we have received payment in full, including all applicable delivery charges.
This clause 10.5 only applies if you are a consumer.
10.5 If we miss the 30 day delivery deadline for Standard Products then you may cancel your Order straight away if any of the following apply:
10.5.1 we have refused to deliver the Products;
10.5.2 delivery within the delivery deadline was essential (taking into account all the relevant circumstances); or
10.5.3 you told us before we accepted your order that delivery within the delivery deadline was essential.
10.6 If you do not wish to cancel your order straight away, or do not have the right to do so under clause 10.5, you can give us a new deadline for delivery, which must be reasonable, and you can cancel your Order if we do not meet the new deadline.
10.7 If you do choose to cancel your Order for late delivery under clause 10. 5 or clause 10.6, you can do so for just some of the Products or all of them, unless splitting them up would significantly reduce their value – please note, this does not apply for Products that are made to order, bespoke, personalised or tailored to your specifications. If the Products have been delivered to you, you will have to return them to us or allow us to collect them, and we will pay the costs of this. After you cancel your Order we will refund any sums you have paid to us for the cancelled Products and their delivery.
10.8 You must inspect the goods as soon as possible following delivery and at the latest within 48 hours of receipt advise us of any damaged or missing parts.
11. International delivery
11.1 rooflights.com offers deliveries of its products and services to the UK mainland only. It does not deliver to the Highlands and Islands of Scotland, Northern Ireland, Isle of Man, Isles of Scilly or Channel Islands. Deliveries to addresses outside of the UK mainland can be processed via alternative methods, please contact us by email at info@rooflights.com or contact our team by telephone on 01379 771002 (the “International Delivery Destinations”). However, there are restrictions on some Products for certain International Delivery Destinations, so please review the information on that page carefully before ordering Products.
11.2 If you order Products from our site for delivery to one of the International Delivery Destinations, your order may be subject to import duties and taxes which are applied when the delivery reaches that destination. Please note that we have no control over these charges and we cannot predict their amount.
11.3 You will be responsible for payment of any such import duties and taxes. Please contact your local customs office for further information before placing your order.
11.4 You must comply with all applicable laws and regulations of the country for which the Products are destined. We will not be liable or responsible if you break any such law.
12. Price of products and delivery charges
12.1 The prices of the Products will be: (i) for orders placed on our site, as quoted on our site at the time you place your order; or (ii) for orders placed by telephone, as quoted on our site and confirmed to you on the telephone at the time of the call. We take all reasonable care to ensure that the prices of Products advised to you are correct. However, please see clause 12.5 for what happens if we discover an error in the price of Product(s) you ordered.
12.2 Prices for our Products may change from time to time, but changes will not affect any order you have already placed.
12.3 The price of a Product includes VAT (where applicable) at the applicable current rate chargeable in the UK for the time being. However, if the rate of VAT changes between the date of your order and the date of delivery, we will adjust the VAT you pay, unless you have already paid for the Products in full before the change in VAT takes effect.
12.4 The price of a Product does not include delivery charges. Our delivery charges are: (i) for orders placed on our site, as advised to you during the check-out process; or (ii) for orders placed by telephone, as sold to you on the telephone at the time of the call, before you confirm your order. To check relevant delivery charges, please contact us by email at info@rooflights.com or contact our Customer Services team by telephone on 01379 771002.
12.5 It is always possible that, despite our reasonable efforts, some of the Products we sell may be incorrectly priced. If we discover an error in the price of the Products you have ordered, we will contact you to inform you of this error and we will give you the option of continuing to purchase the Product at the correct price or cancelling your order. For example, occasionally special offers may have expired but not been updated on our website. We will not process your order until we have your instructions. If we are unable to contact you using the contact details you provided during the order process, we will treat the order as cancelled and notify you in writing. Please note that if the pricing error is obvious and unmistakeable and could have reasonably been recognised by you as a mispricing, we do not have to provide the Products to you at the incorrect (lower) price.
13. How to pay
13.1 Payment in full by debit or credit card or Paypal
14. Our warranty for the Products
14.1 We provide a warranty that on delivery and for a period of 24 months from delivery, the Products shall be free from material defects. However, this warranty does not apply in the circumstances described in clause 14.2.
14.2 The warranty in clause 14.1 does not apply to any defect in the Products arising from:
14.2.1 fair wear and tear;
14.2.2 willful damage, abnormal storage or working conditions, accident, negligence by you or by any third party;
14.2.3 if you fail to operate or use the Products in accordance with the user instructions;
14.2.4 any alteration or repair by you or by a third party who is not one of our authorised repairers; or
14.2.5 any specification provided by you.
14.3 If you are a consumer, this warranty is in addition to, and does not affect, your legal rights in relation to Products that are faulty or not as described. Advice about your legal rights is available from your local Citizens’ Advice Bureau or Trading Standards office.
14.4 For full information regarding your warranty, please refer to our warranty document.
15. Our liability if you are a business
This clause 15 only applies if you are a business customer.
15.1 We only supply the Products for internal use by your business, and you agree not to use the Product for any resale purposes.
15.2 Nothing in these Terms limits or excludes our liability for:
15.2.1 death or personal injury caused by our negligence;
15.2.2 fraud or fraudulent misrepresentation;
15.2.3 breach of the terms implied by section 12 of the Sale of Goods Act 1979 (title and quiet possession); or
15.2.4 defective products under the Consumer Protection Act 1987.
15.3 Subject to clause 15.2, we will under no circumstances whatsoever be liable to you, whether in contract, tort (including negligence), breach of statutory duty, or otherwise, arising under or in connection with the Contract for:
15.3.1 any loss of profits, sales, business, or revenue;
15.3.2 loss or corruption of data, information or software;
15.3.3 loss of business opportunity;
15.3.4 loss of anticipated savings;
15.3.5 loss of goodwill;
15.3.6 any liability incurred by you in relation to any finance or credit agreement with Klarna Bank; or
15.3.7 any indirect or consequential loss.
15.4 Subject to clause 15.2, our total liability to you in respect of all losses arising under or in connection with the Contract, whether in contract, tort (including negligence), breach of statutory duty, or otherwise, shall in no circumstances exceed £10,000 or 20% the price of the Products.
15.5 Except as expressly stated in these Terms, we do not give any representation, warranties or undertakings in relation to the Products. Any representation, condition or warranty which might be implied or incorporated into these Terms by statute, common law or otherwise is excluded to the fullest extent permitted by law. We will not be responsible for ensuring that the Products are suitable for your purposes.
16. Our liability if you are a consumer
This clause 16 only applies if you are a consumer.
16.1 If we fail to comply with these Terms, we are responsible for loss or damage you suffer that is a foreseeable result of our breach of these Terms or our negligence, but we are not responsible for any loss or damage that is not foreseeable. Loss or damage is foreseeable if it is an obvious consequence of our breach or if it was contemplated by you and us at the time we entered into this contract.
16.2 We only supply the Products for domestic and private use. You agree not to use the product for any commercial, business or resale purposes, and we have no liability to you for any loss of profit, loss of business, business interruption, or loss of business opportunity.
16.3 We do not in any way exclude or limit our liability for:
16.3.1 death or personal injury caused by our negligence;
16.3.2 fraud or fraudulent misrepresentation;
16.3.3 any breach of the terms implied by section 12 of the Sale of Goods Act 1979 (title and quiet possession);
16.3.4 any breach of the terms implied by section 13 to 15 of the Sale of Goods Act 1979 (description, satisfactory quality, fitness for purpose and samples); and
16.3.5 defective products under the Consumer Protection Act 1987.
17. Events outside our control
17.1 We will not be liable or responsible for any failure to perform, or delay in performance of, any of our obligations under a Contract that is caused by an Event Outside Our Control. An Event Outside Our Control is defined below in clause 17.2.
17.2 An “Event Outside Our Control” means any act or event beyond our reasonable control, including without limitation strikes, lock-outs or other industrial action by third parties, civil commotion, riot, invasion, terrorist attack or threat of terrorist attack, war (whether declared or not) or threat or preparation for war, fire, explosion, storm, flood, earthquake, subsidence, epidemic or other natural disaster, or failure of public or private telecommunications networks or impossibility of the use of railways, shipping, aircraft, motor transport or other means of public or private transport.
17.3 If an Event Outside Our Control takes place that affects the performance of our obligations under a Contract:
17.3.1 we will contact you as soon as reasonably possible to notify you; and
17.3.2 our obligations under a Contract will be suspended and the time for performance of our obligations will be extended for the duration of the Event Outside Our Control. Where the Event Outside Our Control affects our delivery of Products to you, we will arrange a new delivery date with you after the Event Outside Our Control is over.
17.4 You may cancel a Contract affected by an Event Outside Our Control which has continued for more than 30 days. To cancel please contact us. If you opt to cancel, you will have to return (at our cost) any relevant Products you have already received, and we will refund the price you have paid, including any delivery charges.
18. Communications between us
18.1 When we refer, in these Terms, to “in writing”, this will include e-mail.
18.2 If you are a consumer you may contact us as described in clause 1.2.
18.3 If you are a business:
18.3.1 Any notice or other communication given by you to us, or by us to you, under or in connection with the Contract shall be in writing and shall be delivered personally, sent by pre-paid first class post or other next working day delivery service or e-mail.
18.3.2 A notice or other communication shall be deemed to have been received: if delivered personally, when left at our registered office; if sent by pre-paid first class post or other next working day delivery service, at 9.00 am on the second Business Day after posting or if sent by e-mail, one Business Day after transmission.
18.3.3 In proving the service of any notice, it will be sufficient to prove, in the case of a letter, that such letter was properly addressed, stamped and placed in the post and, in the case of an e-mail, that such e-mail was sent to the specified e-mail address of the addressee.
18.3.4 The provisions of this clause shall not apply to the service of any proceedings or other documents in any legal action.
19. Other important terms
19.1 We may transfer our rights and obligations under a Contract to another organisation, but this will not affect your rights or our obligations under these Terms. We will always notify you by posting on this webpage if this happens.
19.2 You may only transfer your rights or your obligations under these Terms to another person if we agree in writing. However, if you are a consumer and you have purchased a Product as a gift, you may transfer the benefit of our warranty in clause 14 to the recipient of the gift without needing to ask our consent.
19.3 This Contract is between you and us. No other person shall have any rights to enforce any of its terms, whether under the Contracts (Rights of Third Parties) Act 1999 or otherwise. However, if you are a consumer, the recipient of your gift of a Product will have the benefit of our warranty at clause 14, but we and you will not need their consent to cancel or make any changes to these Terms.
19.4 Each of the paragraphs of these Terms operates separately. If any court or relevant authority decides that any of them are unlawful or unenforceable, the remaining paragraphs will remain in full force and effect.
19.5 If we fail to insist that you perform any of your obligations under these Terms, or if we do not enforce our rights against you, or if we delay in doing so, that will not mean that we have waived our rights against you and will not mean that you do not have to comply with those obligations. If we do waive a default by you, we will only do so in writing, and that will not mean that we will automatically waive any later default by you.
19.6 If you are a consumer, please note that these Terms are governed by English law. This means a Contract for the purchase of Products from us and any dispute or claim arising out of or in connection with it will be governed by English law. You and we both agree that the courts of England and Wales will have non-exclusive jurisdiction. However, if you are a resident of Northern Ireland you may also bring proceedings in Northern Ireland, and if you are a resident of Scotland, you may also bring proceedings in Scotland.
19.7 If you are a business, a Contract and any dispute or claim arising out of or in connection with it or its subject matter or formation (including non-contractual disputes or claims) shall be governed by and construed in accordance with the law of England and Wales.
19.8 If you are a business, we both irrevocably agree that the courts of England and Wales shall have exclusive jurisdiction to settle any dispute or claim arising out of or in connection with a Contract or its subject matter or formation (including non-contractual disputes or claims).
